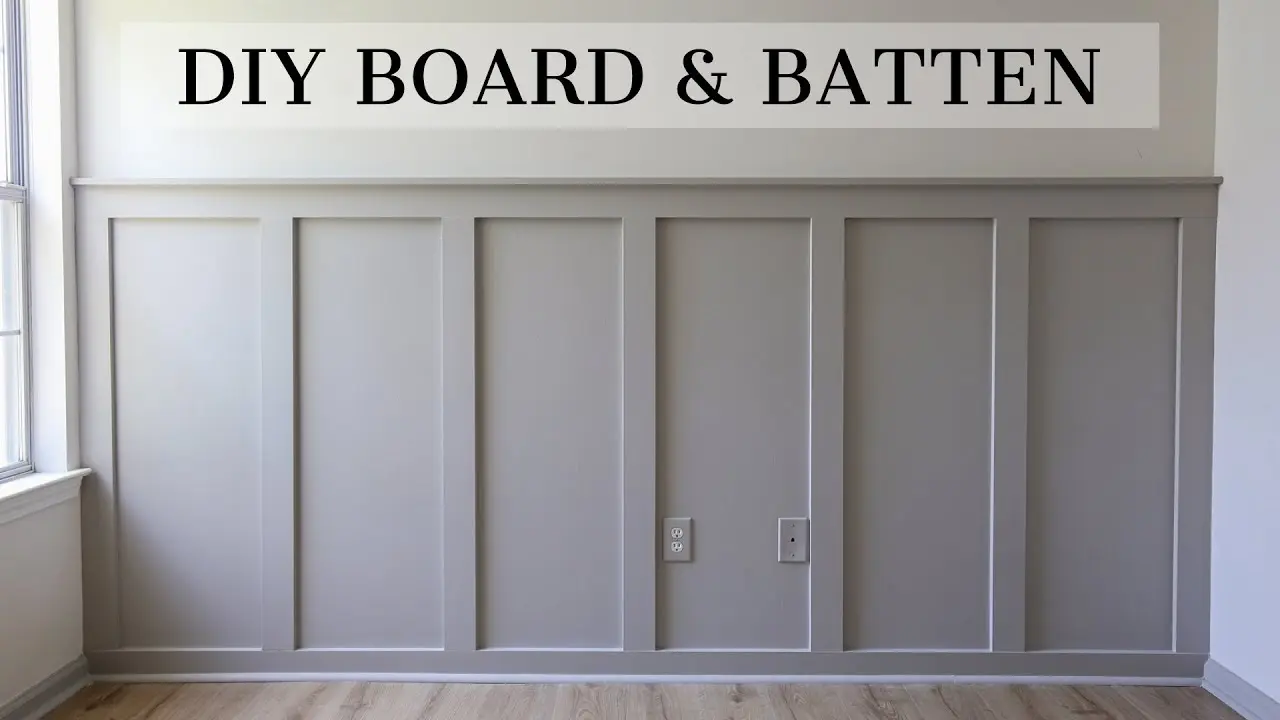
So, you’ve looked at your plain walls for the umpteenth time and decided they need a bit of sprucing up. Enter the DIY Board and Batten wall, the perfect solution to transform your space from mundane to marvelous! Installing a board and batten wall may sound like a task for the pros, but fear not! This step-by-step guide is here to hold your hand through the entire process. Let’s dive in and give those walls a makeover that’ll have your guests exclaiming, “Did you hire a professional?”
Table of Contents
Planning: Where to Begin
Measure Twice, Cut Once
Before you channel your inner handyman, grab your tape measure and pencil! Precision is key, and you want to make sure you’re covering the right wall space. Measure the height and width of the area where you plan to install the board and batten. Jot down the numbers, and don’t forget those pesky corners – they count too!
Material Matters
Now that you’ve got your measurements, it’s shopping time! Head to your local hardware store and gather the essentials:
- Boards (1×4 and 1×6 work well)
- Battens (typically 1×2 or 1×3)
- Level
- Nails or screws
- Saw (a miter saw is ideal)
- Paint or stain of your choice
- Paintbrushes and rollers
- Stud finder
- Carpenter’s glue
- Sandpaper
Pro tip: Grab a bit extra of each material – it’s better to be safe than sorry!
Execution: Getting Down and Dirty
Clear the Canvas
Start with a blank canvas by removing any existing trim, outlet covers, or other obstacles from your wall. You want a smooth surface to work with, so patch up any holes and sand down imperfections. It’s like prepping a canvas before creating a masterpiece!
Find Your Center
Using a stud finder, locate and mark the studs on your wall. This step is crucial for a sturdy board and batten installation. Once you’ve found the studs, draw a vertical line down the center of your wall – this will be your starting point.
Board Placement: The Foundation
It’s time to put those 1×4 boards to work! Starting from the center line, nail or screw the 1x4s horizontally along the wall, ensuring they are level. This forms the foundation of your board and batten masterpiece. Repeat this process, leaving an equal space between each board. Pro tip: Use a spacer to maintain uniform gaps!
Batten Up: Adding Vertical Charm
Now, grab those 1×2 or 1×3 battens and let’s add some vertical flair! Space them evenly between the 1×4 boards, creating a visually appealing pattern. Secure them to the wall with glue and nails or screws. Remember, symmetry is your friend in the world of board and batten.
Corners and Cuts: Navigating the Tricky Bits
Corners can be tricky, but fear not! Use your miter saw to make precise 45-degree cuts for a seamless finish. Measure twice, cut once, and watch those corners come together beautifully. You’re not just installing a wall; you’re crafting a work of art!

Finishing Touches: Bring It to Life
Sand It Down
Smooth out any rough edges with sandpaper. A little sanding goes a long way in achieving a polished, professional look. Your fingertips will thank you!
Paint or Stain: Choose Your Weapon
Now comes the fun part – adding color! Whether you opt for a classic white,navy blue, a bold hue, or a rustic stain, make sure to coat your boards and battens evenly. This is your chance to let your style shine through!
Seal the Deal
To ensure your hard work stands the test of time, seal the deal with a clear coat. This step not only protects your creation but adds a subtle sheen that screams sophistication.

Admire Your Handiwork
Congratulations! You’ve successfully tackled the art of installing a DIY board and batten wall. Step back and revel in the transformation you’ve brought to your space. Not only have you added a touch of charm, but you’ve also gained some serious bragging rights. You’re not just a homeowner; you’re a DIY maestro! So, go ahead – invite friends over, and when they ask, “How did you do it?” proudly say, “I installed a DIY Board and Batten Wall”

FAQs
What kind of wood is used for board and batten walls?
Pine is commonly used for board and batten walls due to its affordability and workability. However, other woods like cedar and MDF (Medium Density Fiberboard) are also popular choices.
Can I install a board and batten wall in any room?
Absolutely! Board and batten walls aren’t picky – they can elevate the style of any room, from bedrooms to living spaces.
Do I need advanced carpentry skills for this project?
Not at all! This DIY project is beginner-friendly, with simple steps that anyone can follow. The most crucial skills required are patience and a can-do attitude!
How to do full wall board and batten?
To create a full wall board and batten, measure and mark batten placement, install horizontal boards (battens), add vertical boards, and finish by caulking and painting. Follow a detailed guide or tutorial for step-by-step instructions.
Is board and batten hard?
Board and batten is considered a moderately easy DIY project. It requires basic tools and woodworking skills, making it accessible for beginners and intermediate DIY enthusiasts.
How wide should board and batten be?
The width of board and batten can vary based on personal preference and design. Common widths for battens range from 3 to 5 inches, but you can adjust the dimensions to achieve the desired look.
How do you attach board and batten to the wall?
Attach board and batten to the wall by first securing horizontal boards (battens) to the wall with a nail gun. Then, add vertical boards, ensuring they align with the pre-marked measurements. Finish by nailing and/or gluing the vertical boards in place.
Is board and batten easy to put up?
Yes, board and batten is generally considered easy to put up, especially for individuals with basic DIY skills. Many DIYers find success with this project, making it a popular choice for home improvements.
How do you batten a brick wall for plasterboard?
To batten a brick wall for plasterboard, attach horizontal battens to the wall using appropriate wall plugs and screws. Ensure the battens are level and spaced correctly. Once the horizontal battens are in place, you can then attach the plasterboard to them using screws.


