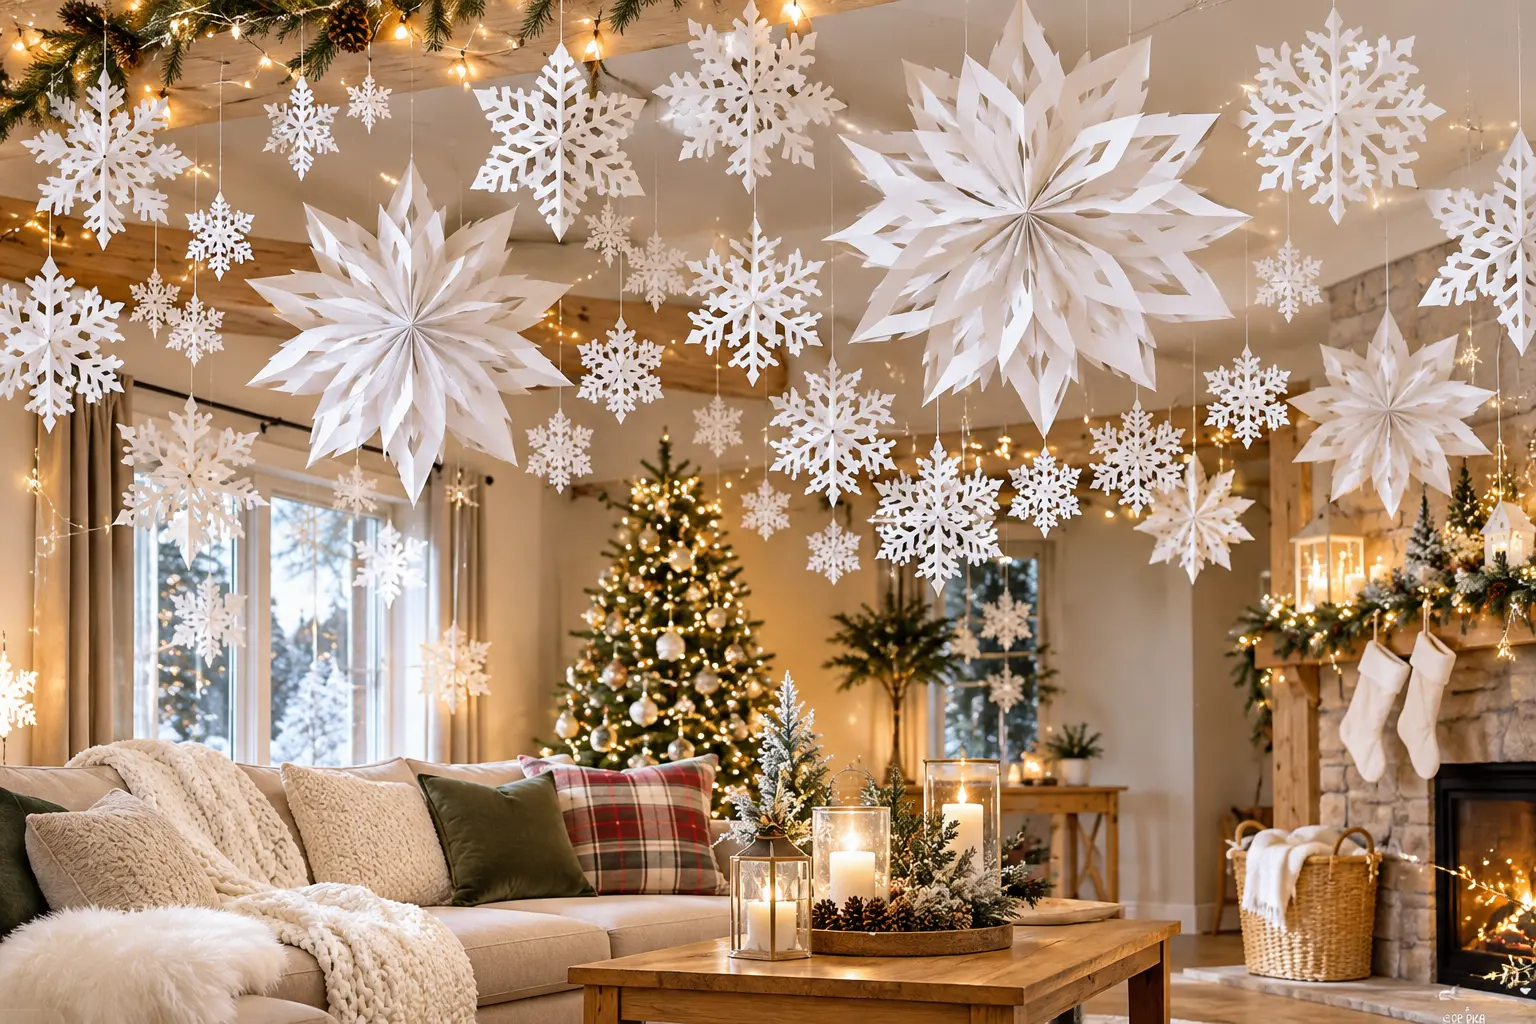
There’s something magical about decorating your home with delicate snowflakes during Christmas. Even without real snow outside, you can create a beautiful winter wonderland using paper, scissors, and a little creativity.
Making paper snowflakes is one of the easiest and most affordable Christmas crafts. You can transform ordinary printer paper into beautiful decorations for windows, walls, ceilings, and Christmas trees.
From simple folded designs to oversized 3D decorations, there are countless ways to create unique snowflakes. Whether you’re crafting with children or preparing your home for the holidays, these ideas offer something for everyone.
Let’s explore 10 beautiful DIY paper snowflake patterns and discover creative ways to decorate your home!
Table of Contents
Materials You’ll Need for DIY Paper Snowflakes
Before starting, gather a few simple supplies:
- 📄 White printer paper or colored paper.
- ✂️ Sharp scissors.
- ✏️ Pencil for drawing patterns.
- 📏 Ruler for measuring.
- 📎 Glue or adhesive tape.
- 🧵 Fishing line for hanging decorations.
- ✨ Glitter for extra sparkle.
- 🎀 Ribbon for decorative finishing.
Which paper is best?
| Paper Type | Best Use |
|---|---|
| Printer paper | Traditional snowflakes |
| Origami paper | Colorful designs |
| Tissue paper | Delicate patterns |
| Kraft paper | Rustic decorations |
| Cardstock | Structured decorations |
Thin paper is generally easier to fold and cut, especially when creating intricate patterns.
How to Make Paper Snowflakes: Easy Step-by-Step Tutorial
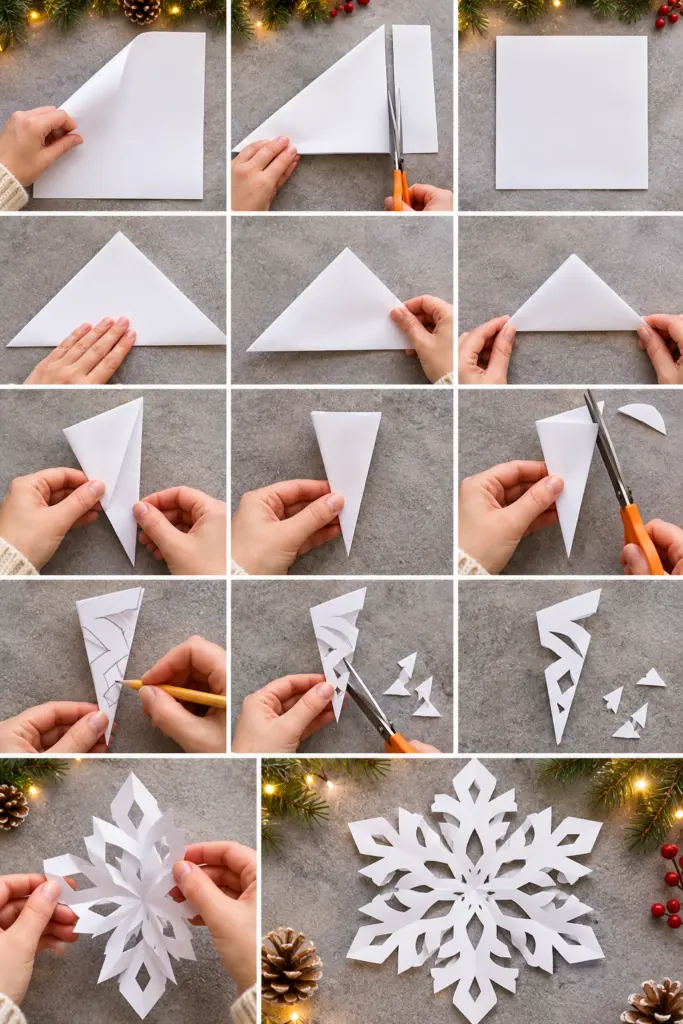
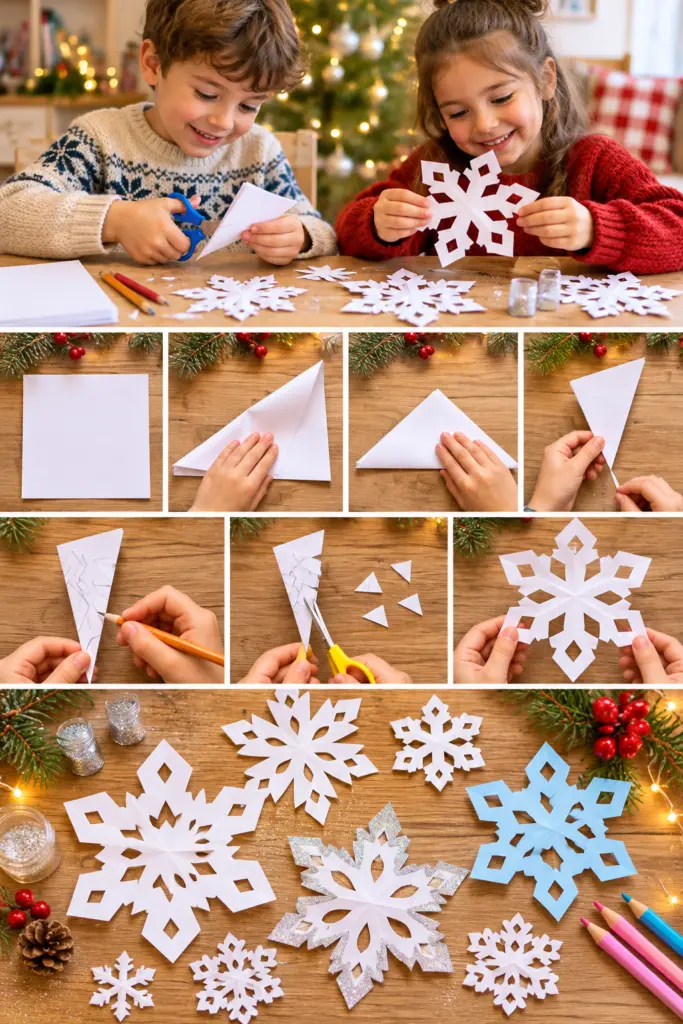
If you’ve never made paper snowflakes before, don’t worry! The basic technique is simple and requires only a few steps.
- Step 1: Prepare a Square
- Start with a rectangular sheet of printer paper. Fold one corner diagonally to form a triangle, then cut off the extra strip underneath.
- Step 2: Fold the Triangle
- Fold the triangle in half again, bringing the pointed corners together. Press the crease firmly.
- Step 3: Fold Into Thirds
- Divide the smaller triangle into three approximately equal sections. Fold one side toward the center, then fold the other side over it.
- Step 4: Trim the Top
- Cut across the uneven top to create a neat edge. You can use a straight or curved cut depending on your preferred design.
- Step 5: Draw Your Pattern
- Use a pencil to draw small triangles, diamonds, curves, or semicircles along the folded edges.
- Step 6: Cut and Unfold
- Carefully cut out your shapes without cutting completely through the folded paper. Slowly unfold the snowflake to reveal your design.
- Finally, flatten it under a heavy book for a few minutes.
10 Beautiful DIY Paper Snowflake Patterns and Ideas
1. Classic Six-Pointed Paper Snowflakes
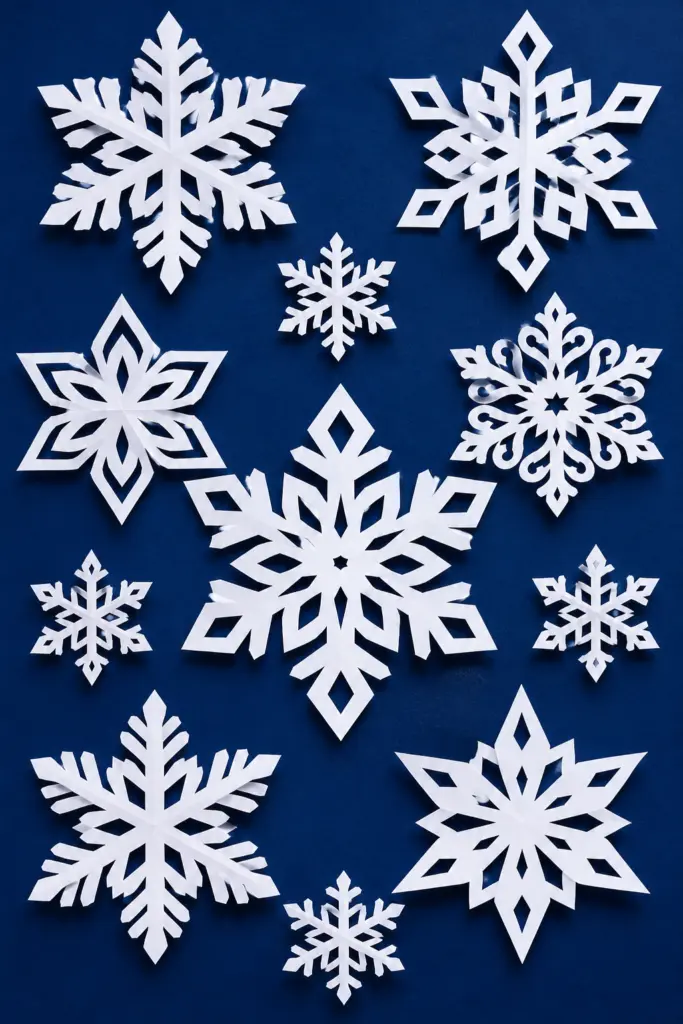
Classic six-pointed snowflakes are timeless Christmas decorations. Their symmetrical shapes resemble natural snow crystals and look beautiful against windows or dark backgrounds.
Follow the basic folding tutorial and experiment with different cuts:
- Small triangles for geometric patterns.
- Diamonds for crystal-inspired designs.
- Curved edges for softer shapes.
- Tiny semicircles for delicate details.
Make several sizes and arrange them together to create a beautiful winter display.
2. Easy Paper Snowflakes for Beginners and Kids
Simple paper snowflakes are perfect for beginners and family crafting activities.
Fold a square sheet diagonally into a triangle, then fold it in half again. Draw simple shapes along the edges, such as triangles, squares, and zigzag lines.
Cut out the shapes and gently unfold the paper.
Children can decorate their finished snowflakes with crayons, colored pencils, or glitter. Younger children should use age-appropriate scissors with adult supervision.
Tip: Prepare the folds for younger children so they can focus on decorating and cutting.
3. Delicate Lace Paper Snowflakes
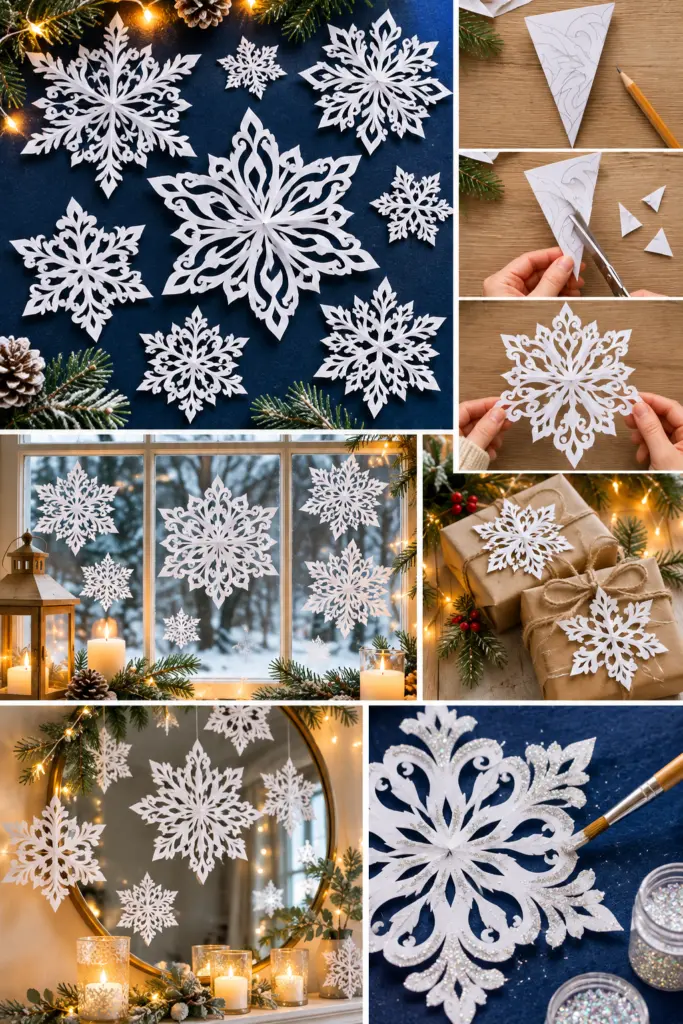
For an elegant appearance, try lace-inspired snowflake patterns.
These designs feature intricate cutouts that look especially beautiful when made with thin white paper.
Combine narrow small diamonds, tiny triangles, small curved openings, repeating leaf shapes, and decorative zigzag patterns.
Avoid removing too much paper, as the remaining sections help hold the snowflake together.
Display these delicate decorations on windows, mirrors, or dark-colored cardstock. Add a little silver glitter for a glamorous Christmas finish.
4. Star-Shaped Paper Snowflakes
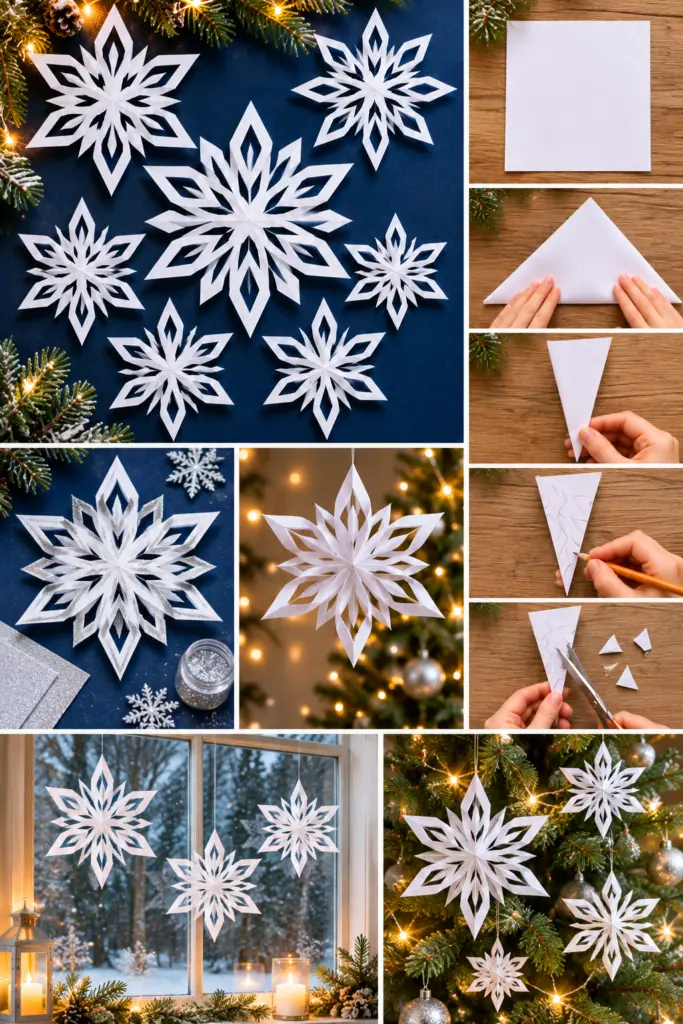
Star-shaped snowflakes combine traditional winter patterns with bold geometric details.
To create one:
- Fold a square sheet using the traditional snowflake technique.
- Cut a sharp V-shaped detail into the outer edge.
- Add smaller triangular openings along the sides.
- Create diamond-shaped cuts near the center.
- Carefully unfold the paper.
The result is a beautiful starburst pattern that works perfectly as a Christmas tree ornament or wall decoration.
Try metallic white paper, silver paper, or glitter cardstock for an extra festive appearance.
5. Giant 3D Paper Snowflakes
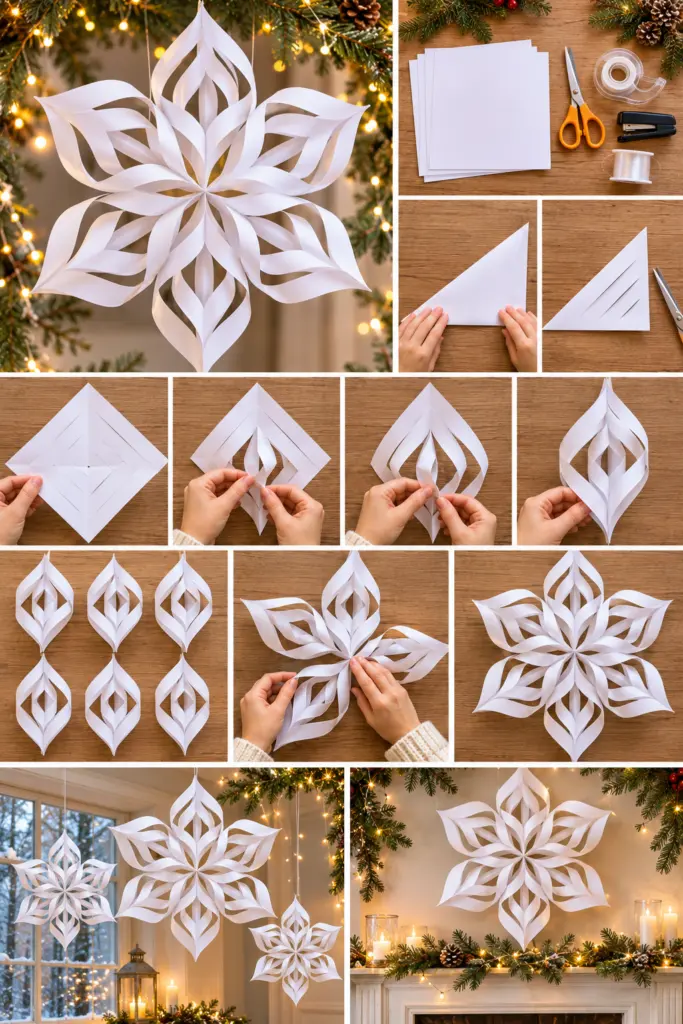
Giant 3D paper snowflakes are perfect for creating statement Christmas decorations. Their layered sections add depth and look wonderful hanging from ceilings or above fireplaces.
Materials:
- Six square sheets of paper.
- ✂️ Scissors.
- 📎 Adhesive tape.
- 📌 Stapler.
- 🧵 Fishing line.
How to make them:
- Cut six identical paper squares.
- Fold each square diagonally into a triangle.
- Make three parallel cuts from the folded side, leaving the opposite edge connected.
- Unfold the paper carefully.
- Bring the innermost corners together and secure them with tape.
- Turn the paper over and connect the next sections in the opposite direction.
- Continue alternating until you create a dimensional shape.
- Repeat with the remaining five squares.
- Arrange all six sections around a central point and staple them together.
Attach fishing line to hang your finished snowflake.
For a beautiful display, combine several white 3D snowflakes with warm fairy lights and evergreen garlands.
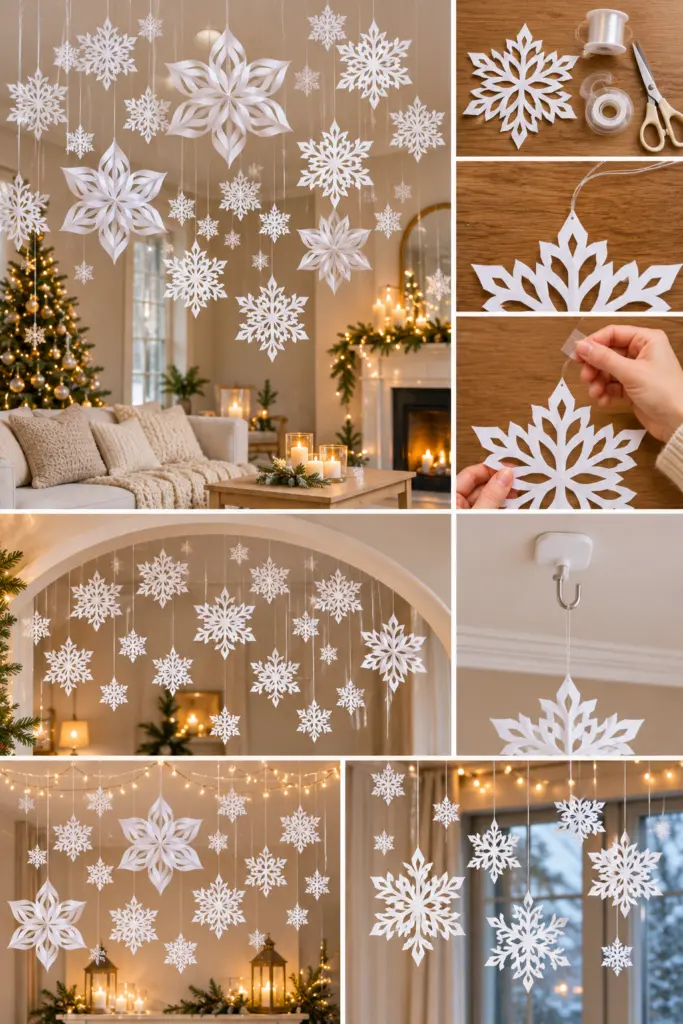
6. Hanging Paper Snowflakes
Turn ordinary paper snowflakes into floating decorations by suspending them from the ceiling.
This idea works beautifully in hallways, living rooms, entryways, and children’s bedrooms.
How to Make Hanging Snowflake Decorations
- Start by creating a collection of paper snowflakes in different sizes.
- You can combine flat six-pointed designs with larger 3D snowflakes to create visual interest.
- Attach a thin piece of transparent fishing line to each snowflake. Use a small piece of clear tape or a tiny hole near the top to secure the thread.
- Next, attach the other end to a suitable ceiling hook or removable hanging system that is safe for your ceiling surface.
You can also arrange several hanging strings next to one another to create a snowflake curtain above a doorway or archway.
White snowflakes look especially elegant in neutral interiors with beige walls, wooden furniture, and warm lighting.
7. DIY Paper Snowflake Garlands
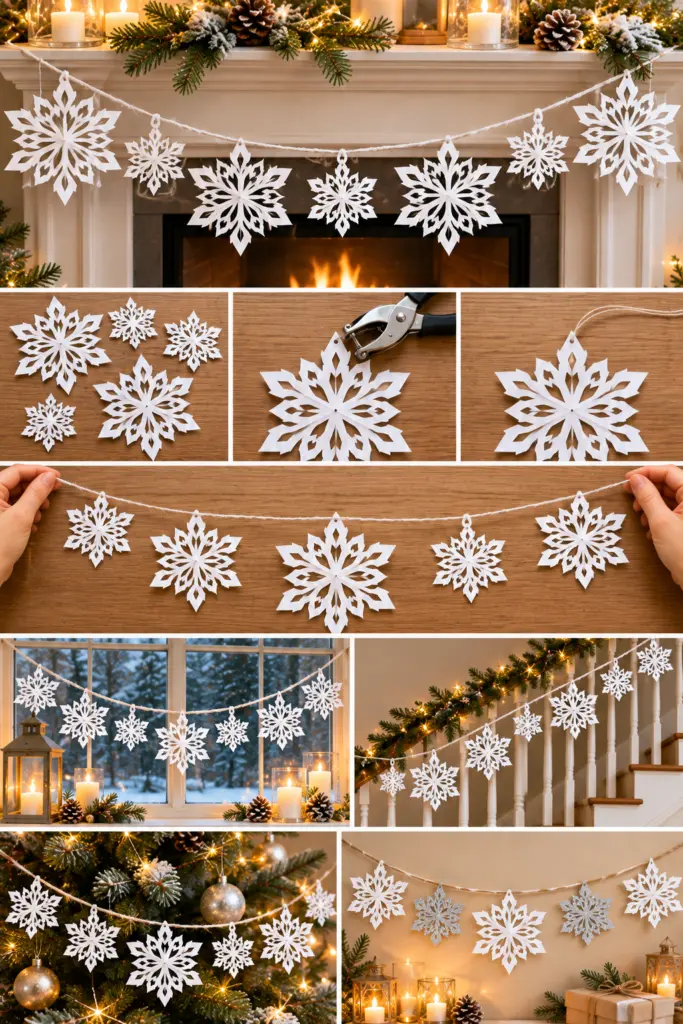
Paper snowflake garlands are an affordable way to decorate fireplaces, windows, staircases, and Christmas trees.
What you’ll need:
- Paper snowflakes in different sizes.
- White string or decorative twine.
- Small hole punch.
- Tape and scissors.
Instructions:
- Make several snowflakes using different patterns.
- Arrange them to plan your garland.
- Punch a small hole near the top of each snowflake.
- Thread the string through the holes.
- Leave equal spaces between the decorations.
- Secure the ends and hang your garland.
For a more interesting design, alternate large and small snowflakes.
You can also mix white and silver paper or combine kraft paper with natural jute string for a rustic Christmas look.
8. Layered Paper Snowflakes
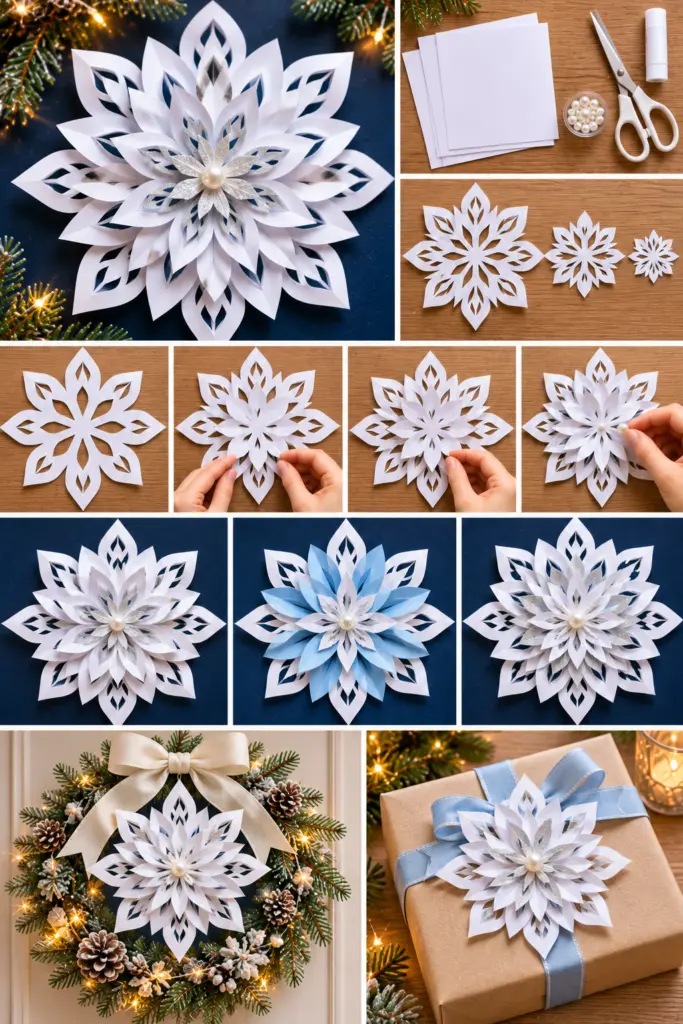
Layered snowflakes create a fuller, more dimensional appearance.
How to Create a Layered Snowflake
- Cut three or four snowflake shapes in different sizes.
- Use the largest snowflake as your base.
- Place the smaller shapes on top, aligning their centers.
- Secure the layers with small dots of glue.
- Gently lift selected paper tips to create a dimensional effect.
- Add a small paper circle, button, or decorative embellishment to the center.
For a classic winter look, use different shades of white.
Alternatively, combine white, pale blue, and silver for a frosty color palette.
These decorations work wonderfully as Christmas tree ornaments, gift toppers, handmade greeting cards, and you can also make a large layered snowflake and use it as the centerpiece of a holiday wreath..
9. Rustic Kraft Paper Snowflakes
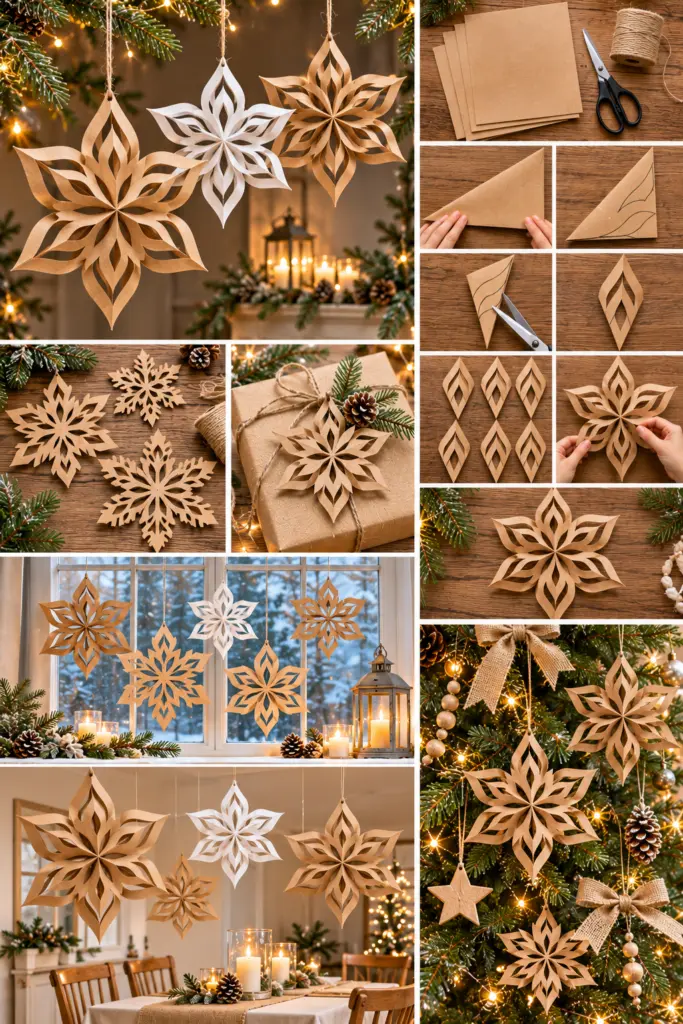
If you love natural Christmas decorations, kraft paper snowflakes are a lovely alternative to traditional white designs.
Simply replace white printer paper with lightweight brown craft paper and follow the same folding and cutting technique.
These warm-toned decorations look beautiful with:
- Natural jute string.
- Wooden Christmas ornaments.
- Pine branches.
- Warm white fairy lights.
- Cream-colored ribbons.
Make oversized kraft paper snowflakes and hang them above your dining table for a cozy rustic Christmas atmosphere.
For a more dramatic look, combine brown and white 3D snowflakes at different heights.
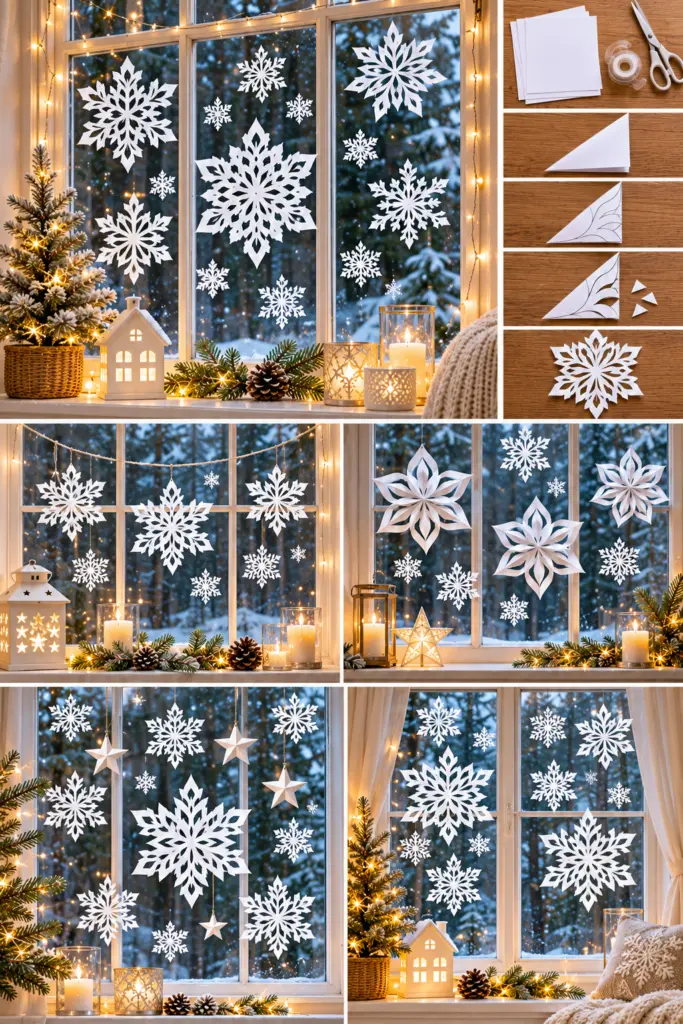
10. Paper Snowflake Window Displays
Windows are among the prettiest places to display handmade snowflakes.
Natural daylight highlights the delicate cutout patterns and creates a beautiful winter-inspired effect.
Start by making snowflakes in different sizes and designs. Attach them to the glass using small pieces of removable tape or suitable window-safe adhesive.
Place larger snowflakes near the center and smaller ones around the edges.
For an extra festive look, combine your snowflakes with paper stars and warm fairy lights. You can also place a small Christmas tree nearby to complete the display.
And for more festive window look explor our 17 Magical Christmas Window Lights Ideas to complete your Winter Wonderland.
FAQs
Where can I display handmade paper snowflakes?
Use them on windows, walls, ceilings, Christmas trees, mirrors, fireplaces, gift packages, and holiday tables.
How can I hang paper snowflakes from the ceiling?
Attach clear fishing line or lightweight thread to each snowflake. Secure the other end to an appropriate ceiling hook or removable hanging system. Use different thread lengths to create a floating winter display.
How do you make six-pointed paper snowflakes?
Fold a square diagonally, divide the triangle into three equal sections, and cut your desired pattern. Unfold to reveal six symmetrical points.
What paper is best for making snowflakes?
White printer paper is ideal for beginners. Origami paper and tissue paper are also good choices for colorful or delicate designs.
What is the easiest way to make paper snowflakes?
Fold a square sheet of paper diagonally, fold it again, and cut simple shapes along the folded edges. Unfold carefully to reveal your snowflake.
Making paper snowflakes is an easy and affordable way to bring winter magic into your home. With just paper and scissors, you can create everything from simple beginner designs to delicate lace patterns and oversized 3D decorations.
Whether you prefer classic white snowflakes, rustic kraft paper creations, or beautiful hanging displays, these 10 DIY ideas offer plenty of inspiration for Christmas decorating.
Gather your supplies, try different patterns, and enjoy creating your own winter wonderland!
Happy crafting!