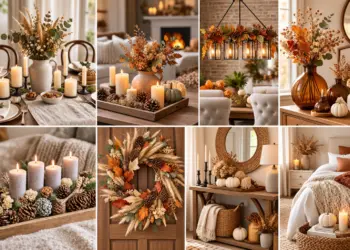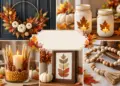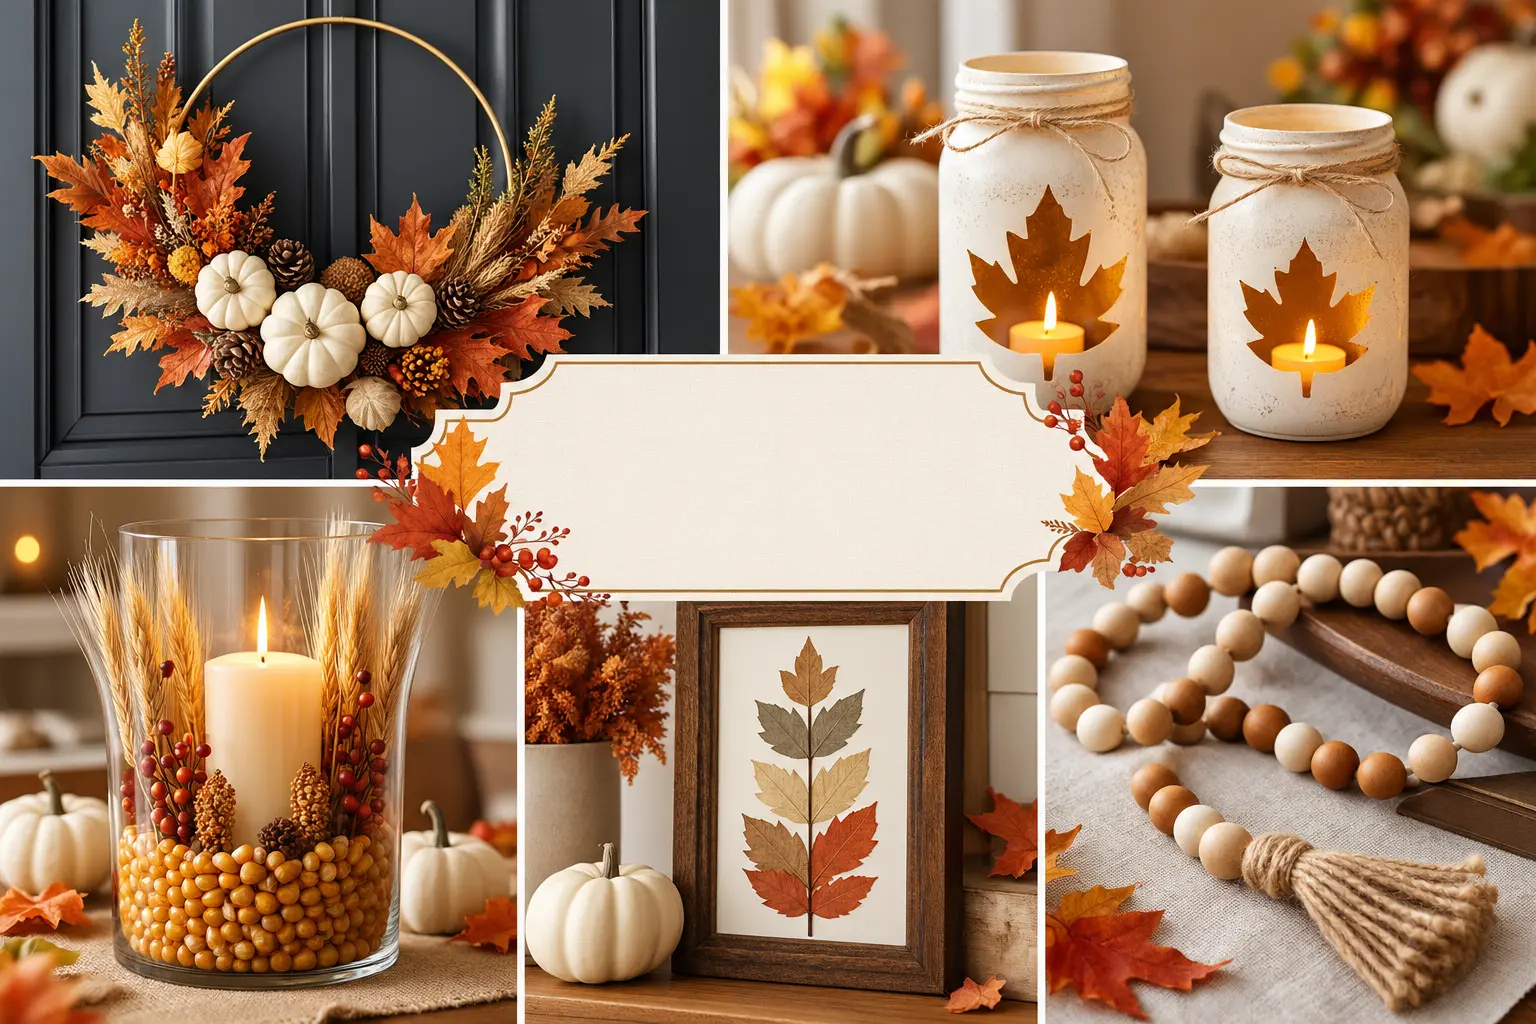
Thanksgiving is the perfect time to bring warmth, creativity, and seasonal charm into our homes. With autumn leaves, pumpkins, pinecones, warm colors, and natural textures, we can create beautiful decorations without spending a fortune. These easy Thanksgiving crafts combine simple materials with creative ideas to help us decorate our living rooms, dining tables, entryways, and mantels for the holiday season.
Whether we prefer rustic farmhouse accents, elegant autumn centerpieces, handmade wreaths, or cozy candle decorations, there is a project for every style and skill level. Many of these DIY Thanksgiving home decorations can be made with affordable supplies, recycled materials, and items collected from nature.
In this guide, we will discover 30 Thanksgiving crafts with step-by-step instructions, including ideas for adults, beginners, and families who enjoy making seasonal decorations together.
Table of Contents
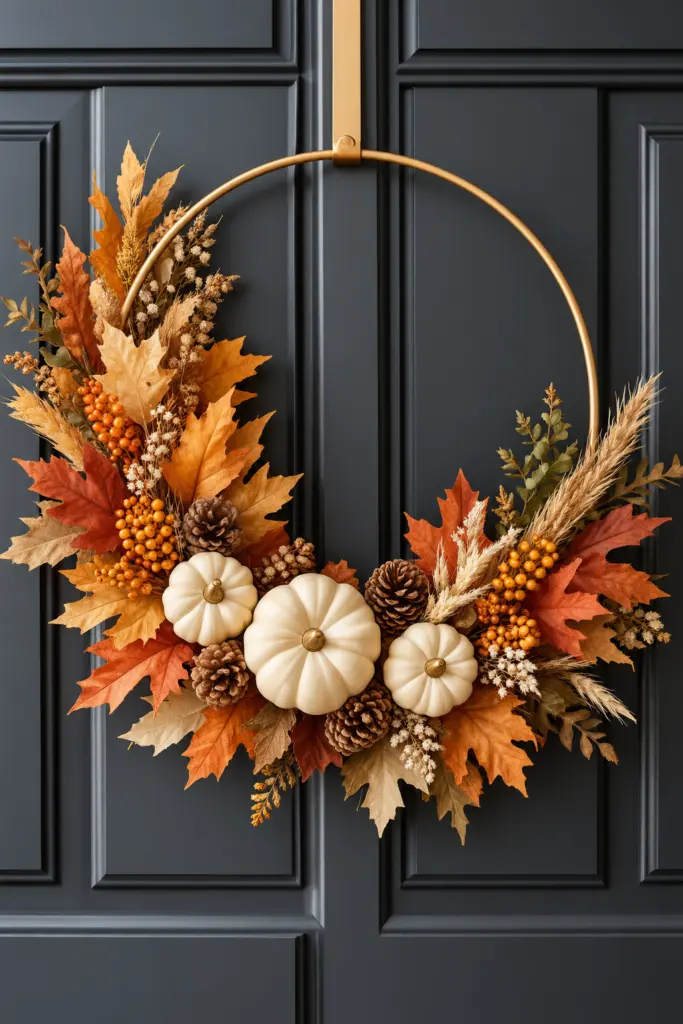
DIY Thanksgiving Wreath with Mini White Pumpkins
A Thanksgiving wreath featuring miniature pumpkins, autumn foliage, and a simple metal hoop creates an elegant welcome for guests. Its natural colors complement modern, farmhouse, and traditional homes.
Materials:
- Gold metal wreath hoop
- Artificial autumn leaves and dried foliage
- Three or four mini white pumpkins
- Pinecones
- Floral wire
- Hot glue gun and glue sticks
Step-by-step instructions:
- Prepare the hoop: Lay the metal hoop on a flat surface and decide where the foliage arrangement will sit.
- Arrange the greenery: Position autumn leaves and dried stems along the lower half of the hoop, creating an asymmetrical design.
- Secure the foliage: Attach the stems with floral wire, wrapping tightly around the hoop.
- Add the pumpkins: Glue or wire three mini white pumpkins into the center of the foliage arrangement.
- Fill the gaps: Add pinecones and smaller leaves to create depth and texture.
- Hang the wreath: Attach a ribbon or hanging loop and display it on your front door or above an entryway console.
Decoration tip: Combine cream, rust, burnt orange, and muted gold for a sophisticated autumn color palette.
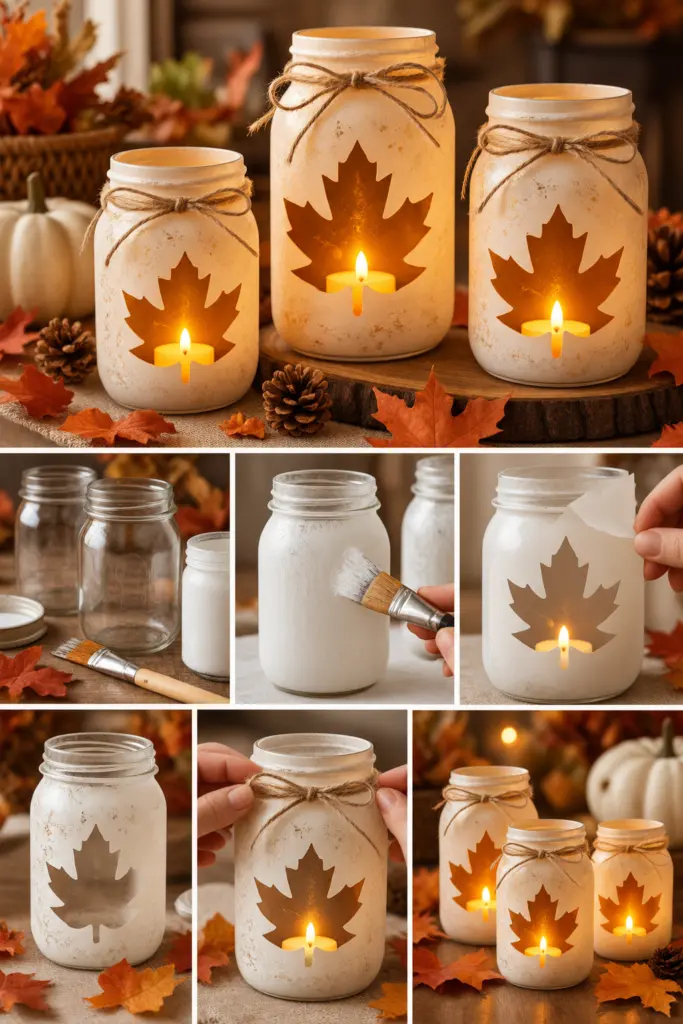
DIY Leaf Mason Jar Candle Holders
Leaf mason jar candle holders bring a soft autumn glow to dining tables, shelves, and bedside tables. Their translucent finishes create a beautiful effect when illuminated by battery-operated tea lights.
Materials:
- Two or three clean mason jars
- Artificial maple leaves or pressed leaves
- White acrylic paint or frosted glass paint
- Craft glue or decoupage medium
- Twine
- Battery-operated tea lights
Step-by-step instructions:
- Clean the jars thoroughly and allow them to dry.
- Apply a thin coat of frosted glass paint or white craft paint suitable for glass.
- Leave a maple-leaf-shaped area uncovered, or use a leaf stencil to create a clear silhouette.
- If using artificial leaves, attach them to the outside with decoupage medium.
- Tie natural twine around the neck of each jar and finish with a small bow.
- Place a battery-operated tea light inside each jar and arrange the holders together.
Decoration tip: Make jars in different heights to create an attractive Thanksgiving centerpiece.
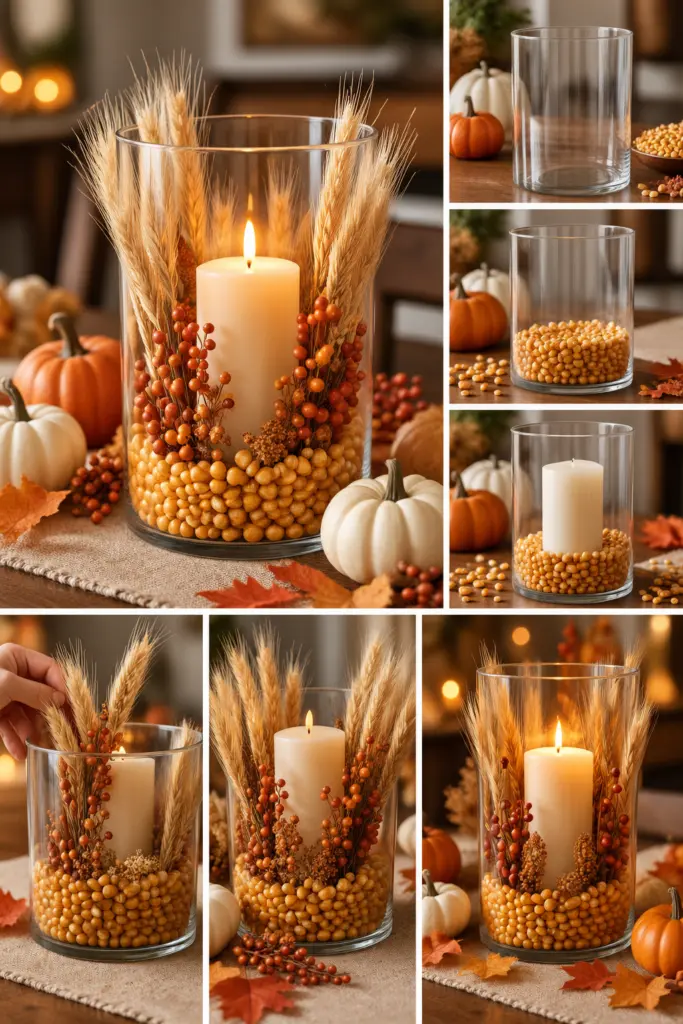
Rustic Thanksgiving Candle Centerpiece
A glass hurricane vase filled with dried corn kernels, wheat stalks, and a candle makes a simple centerpiece with a natural farmhouse feel.
Materials:
- Large clear glass hurricane vase
- Pillar candle or flameless LED candle
- Dried corn kernels
- Wheat stalks
- Small autumn berries or artificial foliage
- Burlap or linen table runner
Step-by-step instructions:
- Choose a wide glass vase that allows enough space around the candle.
- Pour dried corn kernels into the bottom to create a stable decorative layer.
- Place a suitable pillar candle in the center, following the candle manufacturer’s safety instructions.
- Arrange wheat stalks and artificial berries around the candle without allowing them to touch the flame.
- Position the centerpiece on a burlap or linen runner.
- Add a few small pumpkins around the base to complete the arrangement.
Decoration tip: Use an LED candle for a safer display, especially when decorating a busy dining table.
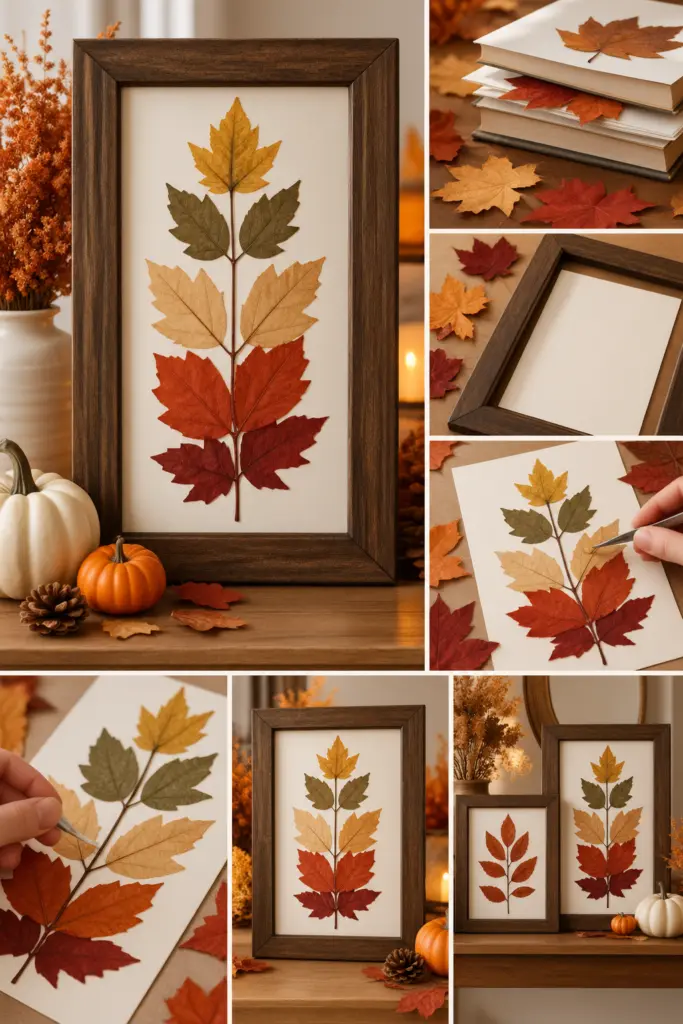
Framed Autumn Leaf Wall Art
Preserving the beauty of autumn leaves is an easy way to create personalized Thanksgiving wall art. A simple wooden frame and carefully arranged leaves can transform natural materials into an elegant decoration.
Materials:
- Wooden picture frame
- White or cream cardstock
- Pressed autumn leaves
- Craft glue
- Tweezers
- Pencil and ruler
Step-by-step instructions:
- Collect colorful leaves and press them between sheets of paper inside a heavy book until they are flat and dry.
- Remove the backing from the frame and cut cardstock to fit.
- Arrange the leaves vertically, horizontally, or in the shape of a tree branch.
- Attach the leaves carefully using small dots of craft glue.
- Allow the glue to dry completely before placing the artwork inside the frame.
- Hang the finished piece above a console table or display it on a mantel.
Decoration tip: Choose a dark walnut frame to contrast with cream paper and rusty red leaves.
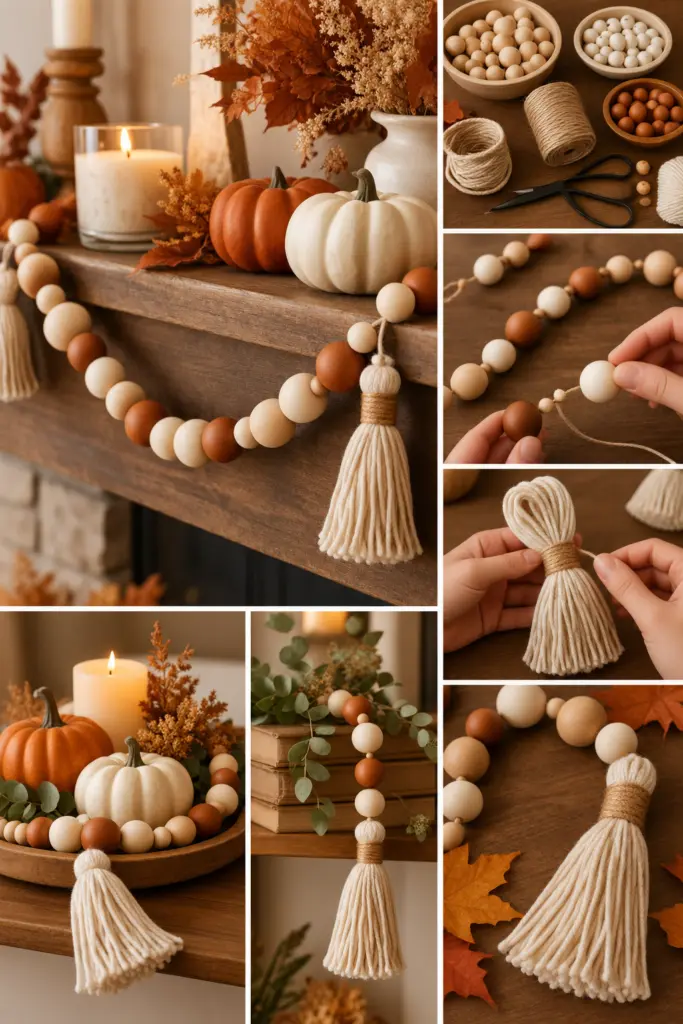
DIY Wooden Bead Garland with a Tassel
A wooden bead garland is a versatile decoration that adds warmth and texture to a Thanksgiving mantel, shelf, or table setting. Natural wood tones work particularly well with neutral autumn decorations.
Materials:
- Wooden craft beads in different sizes
- Cotton cord or jute twine
- Scissors
- Yarn or thick cotton string for a tassel
- Optional acrylic paint
Step-by-step instructions:
- Cut a length of cord slightly longer than the finished garland.
- Arrange the beads by color and size before threading them.
- Thread the beads onto the cord, alternating natural wood, cream, and brown finishes.
- Tie a secure knot at both ends to prevent the beads from slipping off.
- Wrap yarn around your fingers or a small piece of cardboard to make a tassel.
- Tie the tassel to one end of the garland and trim the strands evenly.
- Drape the garland across a mantel, around a decorative tray, or beside miniature pumpkins.
Decoration tip: Keep the palette neutral for an understated look, or add a few terracotta-painted beads for seasonal color.
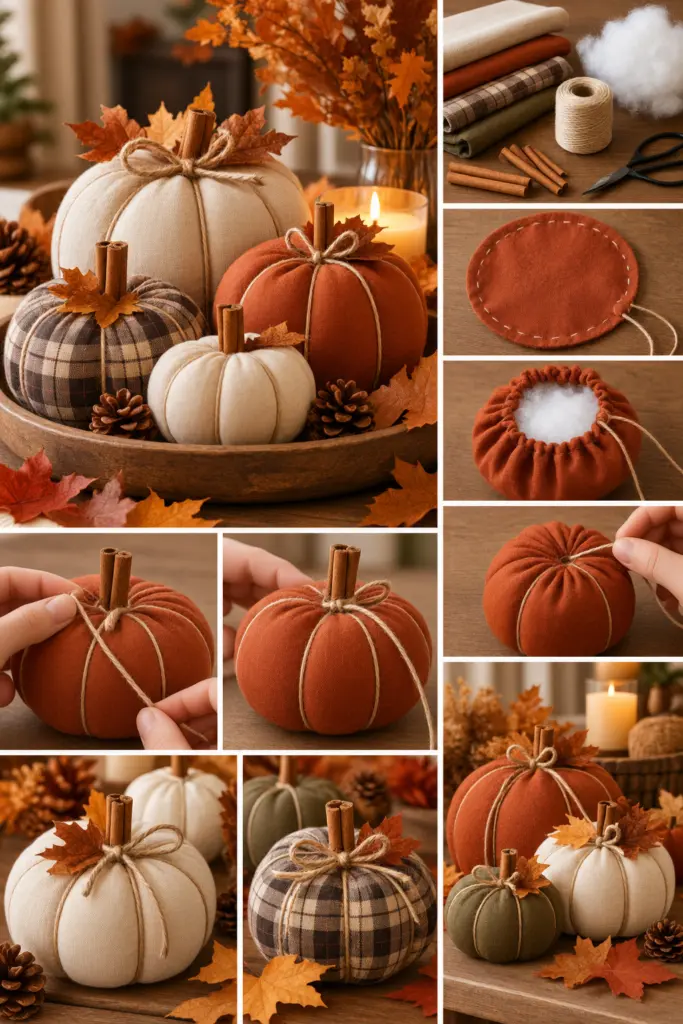
No-Sew Fabric Pumpkin Decorations
Fabric pumpkins are reusable Thanksgiving decorations that can be made from old shirts, linen scraps, or inexpensive cotton fabric.
Materials:
- Fabric scraps
- Polyester stuffing
- Needle and strong thread
- Scissors
- Twine
- Cinnamon sticks or small artificial stems
Step-by-step instructions:
- Cut a circular piece of fabric large enough to form the pumpkin you want.
- Sew a loose running stitch around the edge, leaving long thread ends.
- Pull the thread gently to create a pouch.
- Fill the pouch with stuffing until it forms a rounded shape.
- Tighten the opening and secure it with several stitches.
- Attach a cinnamon stick or artificial stem to the top.
- Wrap twine around the pumpkin from top to bottom, gently shaping the fabric into pumpkin-like sections.
Decoration tip: Use cream linen, rust-colored cotton, or brown fabric to create pumpkins that coordinate with your existing Thanksgiving decorations.
and for more Pumpkin-themed Decorations see our How to Make Pumpkin Centerpieces article for 30+ amazing ideas.
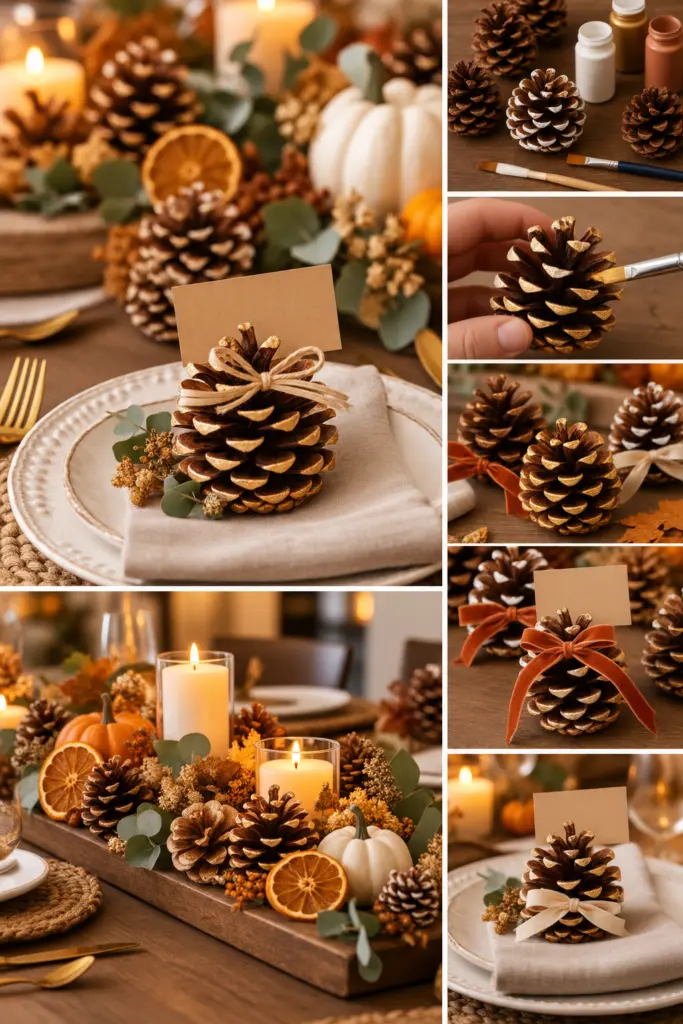
Pinecone Thanksgiving Table Decorations
Pinecones are inexpensive natural materials that bring rustic charm to autumn decorating. They can become place settings, small table accents, or part of a larger centerpiece.
Materials:
- Clean, dry pinecones
- Acrylic paint in cream, gold, or terracotta
- Small paintbrush
- Optional ribbon
- Cardstock for place cards
Step-by-step instructions:
- Brush away dirt and loose debris from the pinecones.
- Apply a small amount of paint to the tips of the scales for a frosted or gilded appearance.
- Leave the pinecones to dry completely.
- Tie a small ribbon around the base if you want a softer decorative finish.
- Write each guest’s name on a small cardstock tag.
- Place the tag between the pinecone scales and position one pinecone beside each dinner plate.
Decoration tip: Combine pinecones with dried orange slices and eucalyptus for a natural Thanksgiving tablescape.
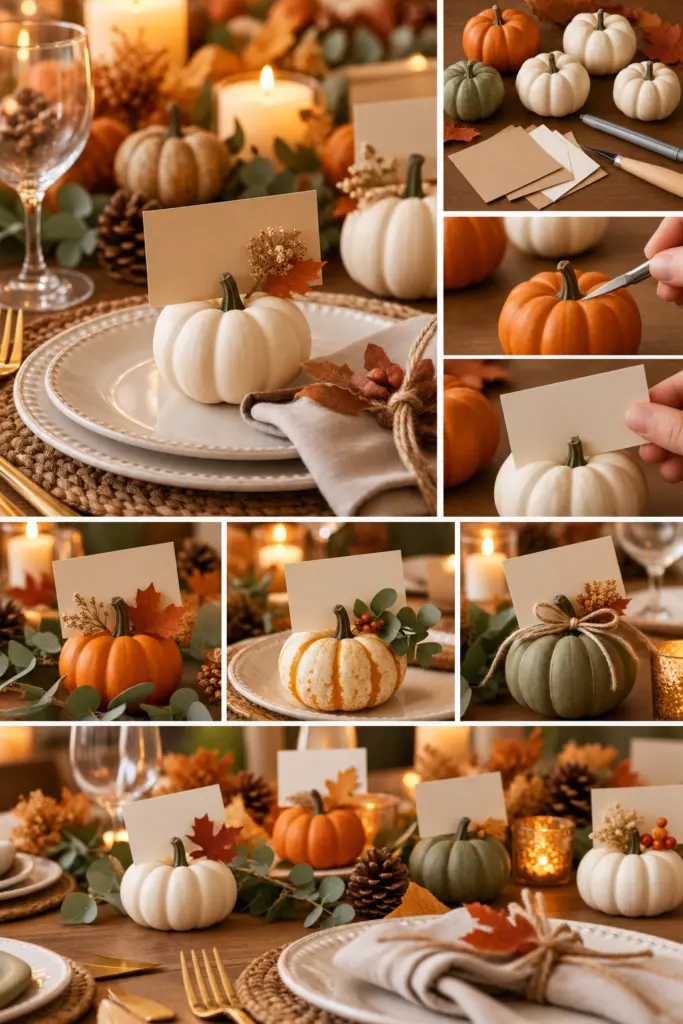
Mini Pumpkin Place Card Holders
Personalized place cards make Thanksgiving dinner feel more thoughtful. Mini pumpkins can hold name cards while adding a festive touch to each place setting.
Materials:
- Mini pumpkins
- Thick cardstock
- Fine-tip marker
- Small craft knife
- Optional ribbon
Step-by-step instructions:
- Wash and dry the pumpkins.
- Cut cardstock into small rectangles or folded tent cards.
- Write each guest’s name in clear lettering.
- If necessary, carefully cut a shallow slit into the top of each pumpkin to hold the card. Adult supervision is essential when using a craft knife.
- Insert the name card and check that it stands securely.
- Place the finished holder above the dinner plate or beside the napkin.
Decoration tip: Use white pumpkins with dark lettering for a modern, elegant place setting.
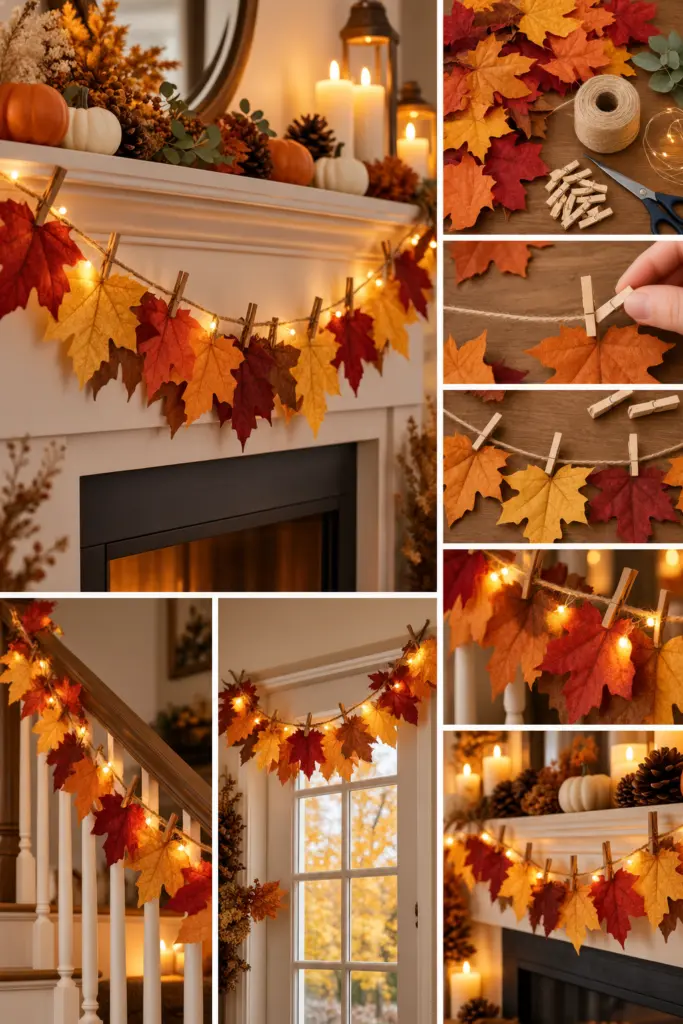
DIY Autumn Leaf Garland
An autumn leaf garland adds color to windows, fireplaces, stair railings, and doorways. This project is especially easy when we use artificial leaves that can be stored and reused.
Materials:
- Artificial autumn leaves
- Jute twine or cotton string
- Small clothespins or floral wire
- Scissors
- Optional fairy lights
Step-by-step instructions:
- Measure the area where the garland will hang.
- Cut the twine slightly longer than the required length.
- Arrange the leaves by color, mixing yellow, orange, burgundy, and brown.
- Attach the leaves using small clothespins or short pieces of floral wire.
- Leave a little space between each leaf to keep the arrangement light and natural.
- Hang the garland across a mantel or window frame.
- Add battery-operated fairy lights if desired, keeping all electrical components away from heat and flammable materials.
Decoration tip: Combine the garland with a simple wooden sign for a welcoming autumn display.
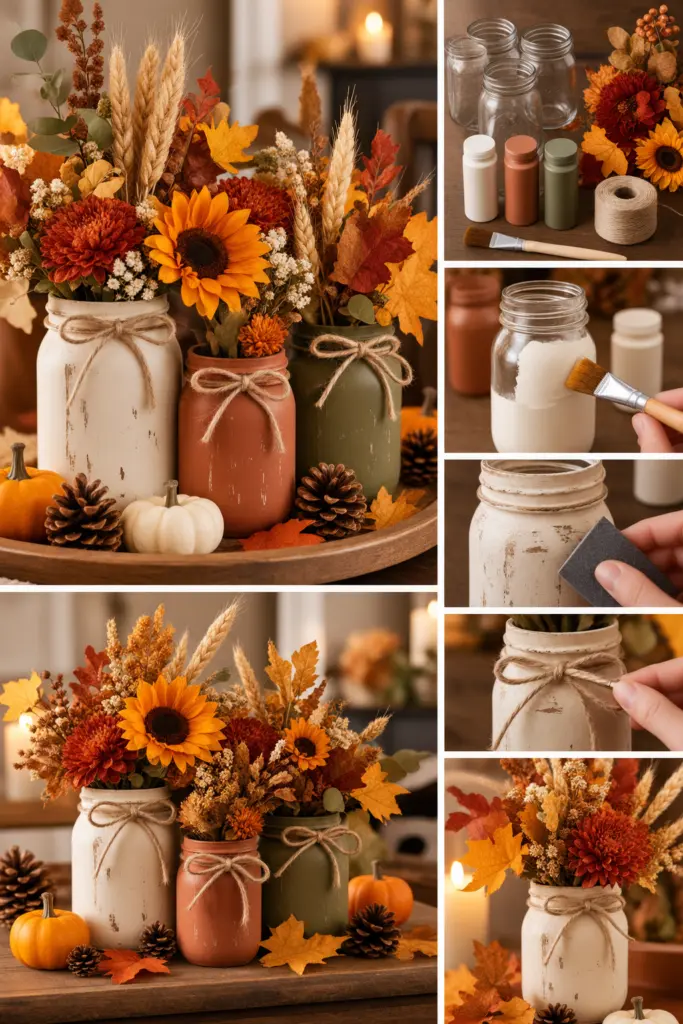
Thanksgiving Mason Jar Flower Vase
A mason jar flower vase is an easy craft that can be adapted to almost any Thanksgiving decorating style. With a little paint, twine, and seasonal foliage, an ordinary jar becomes a charming centerpiece.
Materials:
- Mason jar
- White, beige, or terracotta acrylic paint
- Paintbrush
- Twine
- Artificial autumn flowers or dried stems
- Optional sandpaper
Step-by-step instructions:
- Wash and dry the jar thoroughly.
- Apply two thin coats of paint, allowing each coat to dry.
- Lightly sand selected areas if you want a distressed farmhouse finish.
- Wrap twine around the jar’s neck and secure it with a knot or bow.
- Fill the jar with dried wheat, artificial mums, autumn leaves, or decorative branches.
- Display the vase on a dining table, entryway console, or kitchen shelf.
Decoration tip: Create three jars in different sizes and group them together for a balanced arrangement.
For more Mason Jar ideas see our 25+ DIY Fall Mason Jar Crafts.
DIY Thankful Tree
A thankful tree is both a Thanksgiving decoration and a meaningful way to celebrate gratitude. Family members can write what they appreciate on paper leaves and hang them from decorative branches.
Materials:
- A sturdy vase
- Dried branches
- Colored cardstock
- Scissors
- Hole punch
- Twine
- Markers
Step-by-step instructions:
- Place the branches inside a vase and arrange them so they stand securely.
- Draw simple leaf shapes on cardstock in autumn colors.
- Cut out the leaves and punch a small hole near the top of each one.
- Thread a short piece of twine through every hole.
- Write a gratitude message on each leaf.
- Hang the leaves from different branches, spreading them evenly.
- Invite guests to add their own messages throughout the Thanksgiving celebration.
Decoration tip: Place the tree near the dining table so everyone can contribute before dinner.
DIY Corn Husk Flowers
Corn husk flowers are a creative way to introduce natural textures into Thanksgiving decorations. Their layered petals resemble rustic dahlias and work beautifully in wreaths, vases, and table arrangements.
Materials:
- Clean, dry corn husks
- Scissors
- Craft glue
- Floral wire
- Small cardboard circles
- Optional acrylic paint
Step-by-step instructions:
- Cut the corn husks into petal shapes of different sizes.
- If the husks are too stiff, lightly dampen them and allow them to become flexible before shaping.
- Cut a small cardboard circle to form the flower’s base.
- Glue the largest petals around the outer edge.
- Add smaller petals toward the center, overlapping each layer.
- Attach a small rolled husk or decorative bead to the middle.
- Secure floral wire to the back if you want to use the flower in an arrangement.
Decoration tip: Leave the husks natural for a rustic look, or paint the petal tips in muted gold.
Painted Thanksgiving Pumpkins
Painted pumpkins are a simple alternative to carved pumpkins and can be reused throughout the autumn season. They are suitable for mantels, shelves, entryways, and Thanksgiving centerpieces.
Materials:
- Real or artificial pumpkins
- Acrylic paint
- Paintbrushes
- Painter’s tape
- Optional metallic paint
Step-by-step instructions:
- Clean the pumpkin’s surface and let it dry.
- Apply a base coat in cream, beige, terracotta, or another preferred color.
- Allow the base coat to dry before adding decorative details.
- Paint leaves, dots, stripes, or simple geometric patterns.
- Add a small amount of metallic paint for an elegant accent.
- Let the pumpkin dry completely before arranging it with other decorations.
Decoration tip: Group three pumpkins in different sizes, using one neutral shade and two complementary autumn colors.
Dried Orange Slice Garland
Dried orange slices add warm color and a subtle seasonal fragrance to Thanksgiving decorations. Their translucent appearance makes them particularly attractive when displayed near natural light.
Materials:
- Oranges
- Sharp kitchen knife
- Baking tray
- Parchment paper
- Cotton twine
- Large needle
Step-by-step instructions:
- Preheat the oven to approximately 200°F (95°C).
- Slice the oranges into thin, even rounds.
- Blot the slices with paper towels to remove excess moisture.
- Arrange them in a single layer on a parchment-lined baking tray.
- Dry them in the oven for approximately three to four hours, turning periodically and checking frequently to prevent burning.
- Allow the slices to cool completely.
- Carefully thread the dried slices onto cotton twine, leaving space between them.
- Hang the garland across a mantel or window.
Decoration tip: Combine the orange slices with cinnamon sticks and bay leaves for a traditional autumn-inspired display.
DIY Rustic Thanksgiving Sign
A handmade Thanksgiving sign adds a personal touch to a mantel, kitchen, or entryway. It can feature a simple message such as “Give Thanks,” “Gather,” or “Grateful.”
Materials:
- Wooden board
- Acrylic paint or wood stain
- Stencils or pencil
- Paintbrush
- Sandpaper
- Picture-hanging hardware
Step-by-step instructions:
- Sand the wooden board to remove rough edges.
- Apply a wood stain or paint color that complements your home.
- Let the surface dry completely.
- Sketch your chosen message or position letter stencils on the board.
- Paint the lettering using a contrasting color.
- Add small leaf or pumpkin illustrations if desired.
- Allow the sign to dry and attach suitable hanging hardware.
Decoration tip: Pair a dark wood sign with cream lettering and small white pumpkins for a farmhouse-inspired display.
DIY Acorn Napkin Rings
Acorn napkin rings bring the beauty of autumn into the Thanksgiving dining room. Their natural colors work well with linen napkins, wooden chargers, and neutral tableware.
Materials:
- Plain wooden napkin rings or cardboard rings
- Artificial acorns
- Craft glue
- Twine
- Small autumn leaves
Step-by-step instructions:
- Arrange the acorns and leaves before attaching them to the ring.
- Apply small amounts of craft glue to the back of each decoration.
- Attach the acorns around one side of the ring, creating a balanced cluster.
- Fill small gaps with artificial leaves or short pieces of twine.
- Allow the glue to dry completely.
- Slide a folded cloth napkin through each ring before setting the table.
Decoration tip: Use matching napkin rings across the table, then introduce variety through napkin colors.
Thanksgiving Mason Jar Utensil Holders
Decorative mason jars help organize forks, knives, and spoons while keeping the Thanksgiving table attractive. They are particularly useful for buffet-style dinners and informal family gatherings.
Materials:
- Three clean mason jars
- Acrylic paint
- Paintbrush
- Twine or ribbon
- Small cardstock labels
- Marker
Step-by-step instructions:
- Wash the jars and let them dry completely.
- Paint each jar in a coordinated autumn shade.
- Allow the paint to dry before adding any decorative details.
- Tie twine around the neck of each jar.
- Label the jars “Forks,” “Knives,” and “Spoons.”
- Place the corresponding utensils inside each jar and arrange them on the buffet table.
Decoration tip: Leave the upper portion of the jars unpainted for a lighter, more modern appearance.
DIY Leaf-Shaped Clay Trinket Dish
A small clay dish shaped like a leaf can hold rings, keys, or decorative acorns. It also makes a thoughtful handmade gift for the autumn season.
Materials:
- Air-dry clay
- Large real leaf
- Rolling pin
- Craft knife or clay tool
- Small bowl
- Acrylic paint
- Clear sealant suitable for air-dry clay
Step-by-step instructions:
- Knead the clay until it is smooth and easy to work with.
- Roll it into an even sheet.
- Press a clean leaf onto the surface to transfer its veins.
- Cut around the leaf’s outline using a clay tool.
- Place the clay leaf inside a small bowl to create a shallow dish shape.
- Let it dry according to the manufacturer’s instructions.
- Paint the dish in cream, terracotta, or metallic gold and apply a compatible sealant.
Decoration tip: Display the finished dish on an entryway console with miniature pumpkins and a wooden bead garland.
Mini Pumpkin Topiary
A pumpkin topiary creates vertical interest and makes a charming accent for porches, entryways, and covered outdoor spaces.
Materials:
- Three artificial pumpkins in graduated sizes
- Wooden dowel or sturdy central support
- Decorative planter
- Floral foam
- Moss
- Hot glue gun
Step-by-step instructions:
- Place floral foam securely inside the planter.
- Insert the wooden dowel vertically into the foam.
- Position the largest pumpkin at the bottom, followed by the medium and smallest pumpkins.
- Secure the pumpkins to the support using a method suitable for their material.
- Cover the visible foam with decorative moss.
- Add a small ribbon or artificial foliage around the planter if desired.
Decoration tip: Choose neutral pumpkins for a sophisticated entrance or orange pumpkins for a traditional seasonal display.
DIY Autumn Wheat Bundle Centerpiece
Wheat bundles bring a natural, harvest-inspired look to Thanksgiving tables. They require very little crafting and can be reused in different arrangements throughout autumn.
Materials:
- Dried wheat stalks
- Twine or ribbon
- Scissors
- Decorative vase or pitcher
- Optional dried flowers
Step-by-step instructions:
- Gather the wheat stalks into a loose bundle.
- Trim the stems to a uniform length.
- Arrange the heads at slightly different heights for a natural silhouette.
- Wrap twine around the stems and tie a secure knot.
- Place the bundle in a tall vase or pitcher.
- Add dried flowers or eucalyptus if desired.
- Position the arrangement where it will not obstruct conversation across the dining table.
Decoration tip: Combine wheat with a few dried orange slices for a warm, harvest-inspired centerpiece.
DIY Thanksgiving Leaf Bowl
A decorative leaf bowl is a lightweight accent for a console table or coffee table. It can hold artificial acorns, small decorative pumpkins, or other lightweight seasonal objects.
Materials:
- Artificial autumn leaves
- Balloon or small bowl as a mold
- Craft glue or decoupage medium
- Plastic wrap
- Soft paintbrush
Step-by-step instructions:
- Cover the outside of a small bowl with plastic wrap, or use an inflated balloon as a mold.
- Brush a thin layer of craft glue or decoupage medium onto the covered surface.
- Place the leaves over the mold, overlapping them to form a shallow bowl.
- Apply additional glue between layers to help the leaves adhere.
- Allow the entire piece to dry fully.
- Carefully remove the mold and plastic wrap.
- Trim any loose edges and fill the bowl with lightweight decorations.
Decoration tip: Use leaves in a combination of rust, gold, and burgundy for a rich autumn finish.
Thanksgiving Wine Cork Pumpkin
Repurposing wine corks into a pumpkin-shaped decoration is an easy recycling project. The finished piece works well on shelves, kitchen counters, and craft-themed centerpieces.
Materials:
- Clean wine corks
- Craft glue or hot glue
- Orange acrylic paint
- Green felt
- Brown twine
- Scissors
Step-by-step instructions:
- Arrange the corks in rows to create a rounded pumpkin silhouette.
- Glue the corks together carefully, using a stable flat surface.
- Allow the adhesive to set completely.
- Paint the corks orange, leaving a few natural if you prefer a rustic finish.
- Cut a small leaf shape from green felt.
- Attach the felt leaf and a short piece of twine to the top.
- Display the pumpkin on a shelf or inside a decorative tray.
Decoration tip: Make two or three cork pumpkins in different sizes for a coordinated display.
DIY Thanksgiving Paper Leaf Branches
Paper leaves offer a long-lasting alternative to fresh foliage. They can be customized to match any Thanksgiving color scheme and arranged in a vase for a simple seasonal display.
Materials:
- Colored cardstock
- Leaf templates
- Scissors
- Thin craft wire
- Floral tape
- Wooden skewers or artificial branches
Step-by-step instructions:
- Draw or print leaf shapes in different sizes.
- Cut the leaves from cardstock in autumn colors.
- Fold each leaf gently along its center to create a natural-looking vein.
- Attach craft wire to the back of each leaf.
- Wrap the wire with floral tape and secure it to a wooden skewer or branch.
- Repeat until you have enough leaves to create a full arrangement.
- Place the branches in a vase and adjust the leaves for balance.
Decoration tip: Mix solid-color leaves with patterned cardstock for a handcrafted, layered look.
DIY Pumpkin Flower Arrangement
A pumpkin flower arrangement creates a striking Thanksgiving centerpiece that combines seasonal produce with fresh or artificial flowers.
Materials:
- Medium pumpkin
- Floral foam suitable for your chosen flowers
- Fresh seasonal flowers or artificial blooms
- Autumn foliage
- Floral scissors
- Waterproof container if using fresh flowers
Step-by-step instructions:
- Choose a stable pumpkin with a flat base.
- If using a real pumpkin as the container, carefully remove the top and scoop out the interior.
- Place a waterproof container inside to protect the pumpkin from moisture.
- Add floral foam appropriate for the arrangement; soak floral foam only if it is designed for fresh flowers.
- Insert the largest flowers first, creating the overall shape.
- Fill the gaps with smaller flowers and foliage.
- Turn the pumpkin to check the arrangement from every side.
Decoration tip: Combine cream flowers, orange chrysanthemums, and muted greenery for a classic Thanksgiving palette.
DIY Thankful Jar
A thankful jar encourages everyone to reflect on the people, experiences, and small moments they appreciate. It can become a meaningful tradition that returns every Thanksgiving.
Materials:
- Clean glass jar
- Decorative ribbon
- Cardstock
- Scissors
- Pens or markers
- Optional stickers
Step-by-step instructions:
- Clean and dry the jar.
- Tie a ribbon around the neck or decorate the outside with a simple label.
- Cut cardstock into small slips of paper.
- Place the slips and pens beside the jar.
- Invite each family member or guest to write something they are thankful for.
- Fold the notes and place them inside.
- Read selected messages together before or after Thanksgiving dinner, if everyone is comfortable sharing.
Decoration tip: Label the jar “Our Gratitude Jar” and keep it on the dining table throughout November.
DIY Thanksgiving Burlap Banner
A burlap banner introduces rustic texture to a mantel, doorway, or dining room wall. Its simple design makes it easy to personalize with seasonal words and shapes.
Materials:
- Burlap or burlap-look fabric
- Scissors
- Twine
- Fabric paint
- Stencils
- Wooden dowel or craft stick
- Fabric glue or sewing supplies
Step-by-step instructions:
- Cut the fabric into evenly sized triangular or rectangular flags.
- Fold the top edge of each flag over the twine or dowel.
- Secure the fold with fabric glue or stitches.
- Arrange the flags in the correct order to spell “GIVE THANKS” or “GRATEFUL.”
- Use stencils and fabric paint to add letters and small leaf designs.
- Let the paint dry completely.
- Hang the banner across a mantel or wall, making sure it is away from candles and other heat sources.
Decoration tip: Add small fabric leaves between the words to give the banner a more seasonal appearance.
DIY Cinnamon Stick Candle Decor
Cinnamon sticks create a rustic decorative border around a candle or flameless LED candle. Their natural texture complements wood, linen, and other autumn materials.
Materials:
- Wide glass candle holder
- Cinnamon sticks
- Twine or decorative ribbon
- Scissors
- Flameless LED candle
Step-by-step instructions:
- Select cinnamon sticks of similar length.
- Place the LED candle inside the glass holder.
- Arrange the cinnamon sticks vertically around the outside of the glass.
- Tie twine around the sticks to hold the arrangement in place.
- Secure the twine with a neat knot or bow.
- Place the finished decoration on a tray with mini pumpkins and dried leaves.
Decoration tip: Use an LED candle rather than an exposed flame because cinnamon sticks and twine are flammable.
DIY Autumn Shadow Box
A shadow box turns small seasonal objects into a three-dimensional display. It can feature pressed leaves, miniature pumpkins, acorns, and a Thanksgiving message.
Materials:
- Deep picture frame or shadow box
- Cardstock or fabric backing
- Pressed leaves
- Small artificial pumpkins and acorns
- Craft glue
- Letter stickers or markers
Step-by-step instructions:
- Remove the backing from the shadow box.
- Cut cardstock or fabric to fit the backing panel.
- Arrange the leaves and miniature decorations before attaching them.
- Add a small message such as “Autumn Blessings” or “Give Thanks.”
- Secure the lightweight decorations using suitable craft glue.
- Allow the glue to dry before assembling the shadow box.
- Display it on a shelf, mantel, or wall.
Decoration tip: Leave some empty space around the objects so the display feels balanced rather than crowded.
DIY Thanksgiving Napkin Fold with a Leaf Accent
A beautifully folded napkin is one of the easiest ways to decorate a Thanksgiving table. Adding a small leaf accent makes the place setting look carefully styled without requiring expensive supplies.
Materials:
- Cloth napkins
- Artificial or clean, dry leaves
- Cotton ribbon or twine
- Small name cards
- Optional cinnamon sticks
Step-by-step instructions:
- Iron the napkins if necessary to remove creases.
- Fold each napkin into a rectangle or simple pocket fold.
- Place the folded napkin on the center of each dinner plate.
- Position an artificial leaf across the napkin.
- Tie the napkin loosely with twine or ribbon if desired.
- Add a name card or small cinnamon stick to complete the setting.
- Repeat the same arrangement for every guest.
Decoration tip: Coordinate the napkins with the table runner, using cream, rust, olive green, or burgundy.
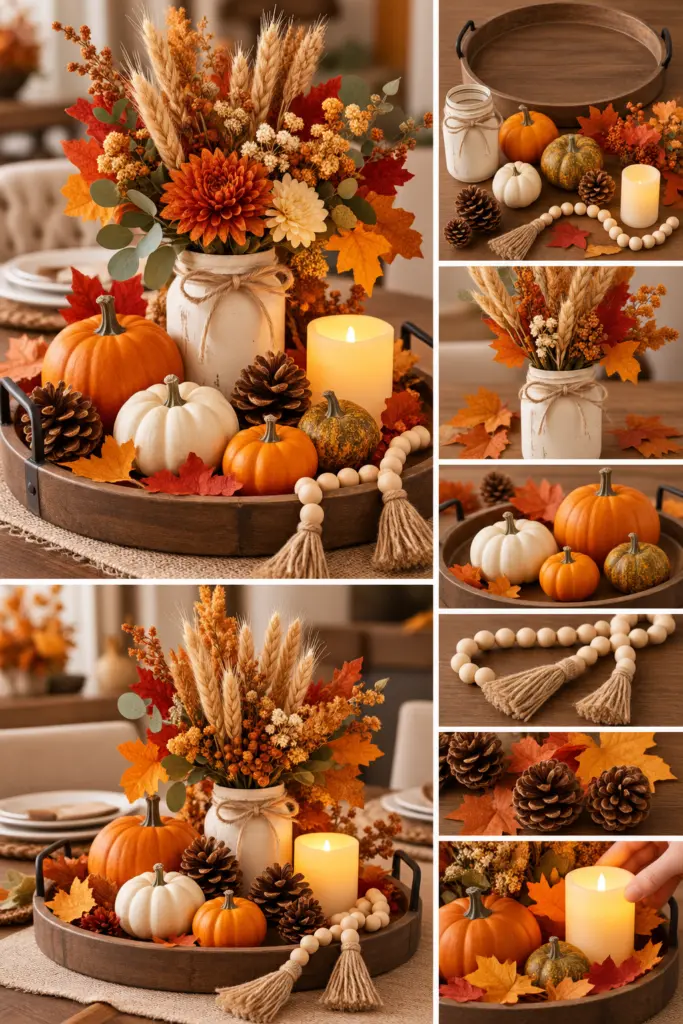
DIY Thanksgiving Table Tray with Mini Pumpkins and Leaves
A decorative tray is a practical way to bring several small Thanksgiving crafts together into one cohesive display. It can sit on a coffee table, dining table, kitchen island, or entryway console.
Materials:
- Wooden or metal tray
- Mini pumpkins
- Artificial autumn leaves
- Small mason jar vase
- Wooden bead garland
- Pinecones
- Optional flameless candle
Step-by-step instructions:
- Choose a tray large enough to hold the decorations without crowding them.
- Place the tallest object, such as a vase of wheat, toward the back.
- Add three mini pumpkins in different sizes to create visual balance.
- Arrange autumn leaves around the base of the objects.
- Place pinecones in any remaining gaps.
- Drape a wooden bead garland along one edge of the tray.
- Add a flameless candle if desired, then adjust the arrangement until it looks balanced from every angle.
Decoration tip: Keep the number of colors limited to three or four so the centerpiece looks coordinated and elegant.
Creating DIY Thanksgiving home decorations is an enjoyable way to prepare our homes for the autumn season while adding personal touches to familiar spaces. From an elegant white pumpkin wreath to a rustic wheat centerpiece, each project offers a simple opportunity to transform affordable materials into something special.
We can start with just two or three crafts, repeat the same autumn colors throughout the home, and gradually add handmade decorations that reflect our preferred style. Whether we are preparing a Thanksgiving dinner, decorating an entryway, or creating a cozy living room display, these 30 easy Thanksgiving crafts provide practical inspiration for a warm, welcoming holiday.
The best decorations are not necessarily the most expensive. They are the ones that make our homes feel comfortable, thoughtful, and ready for meaningful moments with family and friends.